How to start using your seedbox
Introduction
Your seedbox is a small part of a larger, remote server, which we call a slot. You can access your seedbox in various ways and make it do your bidding even when your computer is powered off. Your seedbox is completely independent of any other computers.
Your Client Area
The first thing you should try after your seedbox has been activated, is to log in to your client area. This is a custom software, made by us, in order for you to easily manage your seedboxes, payments, monitor your usage and have a general overview of your account.

After you login to your client, click on the "My Client Area" button and you will be redirected to the main page of your dashboard which looks like this:
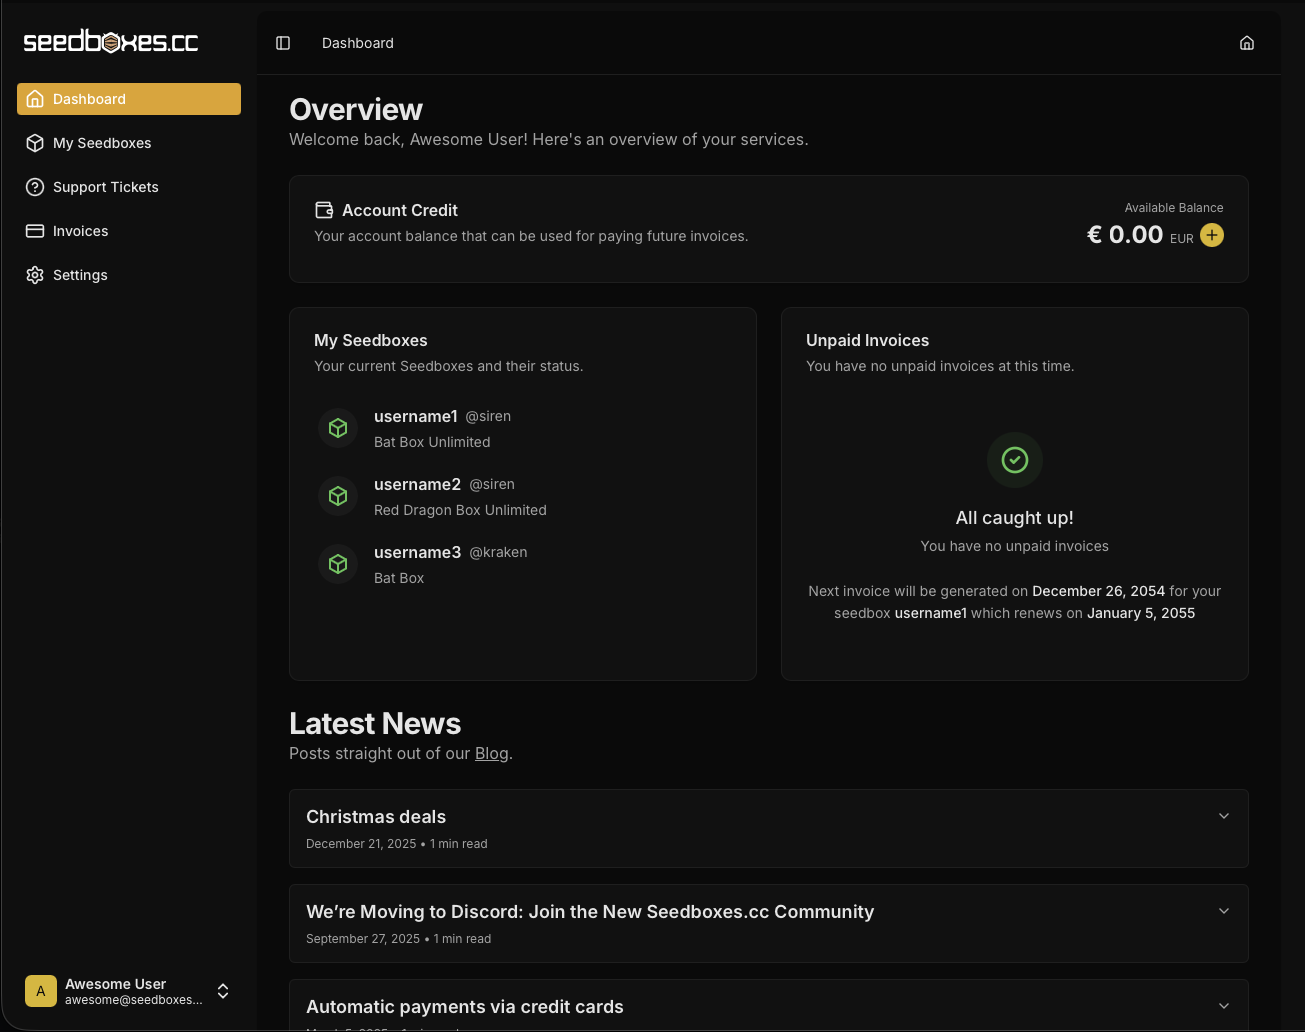
As you can see on the picture above, the main page gives you a good overview of your account. On the sidebar you get the main functionalities of your client area (Dashboard, My Seedboxes, Invoices, Tickets, Settings), on the top of the main page you see your Account Credit, right below a list of your seedboxes and unpaid invoices, and below that, posts from our blog with service announcements.
Under your "Available Balance" there is an "+Add" button from where you can access the "+Add Funds" option which allows you to add funds to your account in order for the system to automatically use and pay any future invoices.
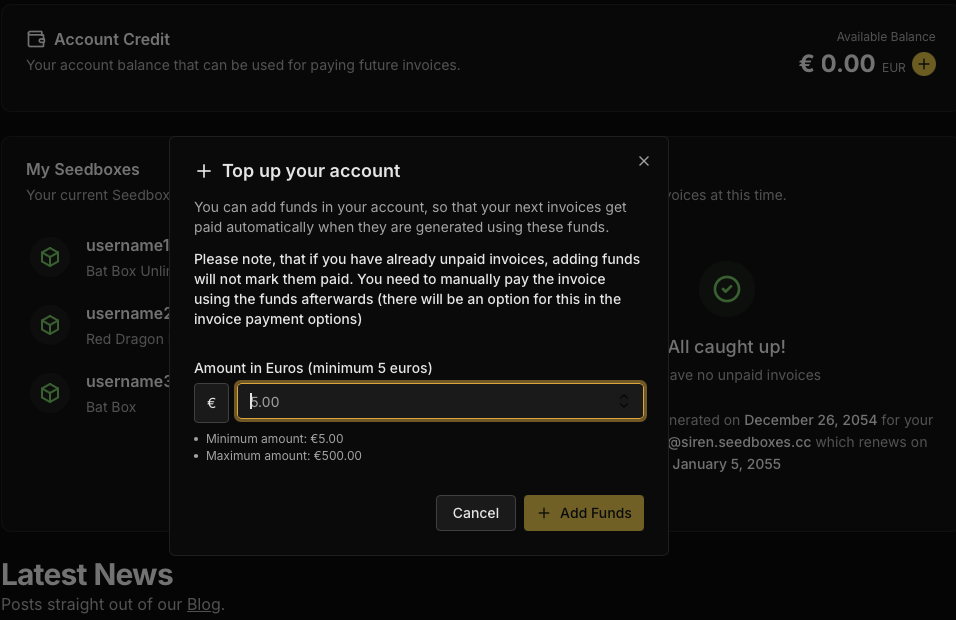
Added funds only work on future invoices. If you have an unpaid invoice, it is better to directly pay it instead of adding funds to your account in order to pay it. Also, in order for an invoice to be automatically paid by funds, the amount of your funds needs to be higher or equal to the amount of an unpaid invoice.
Your Settings Area
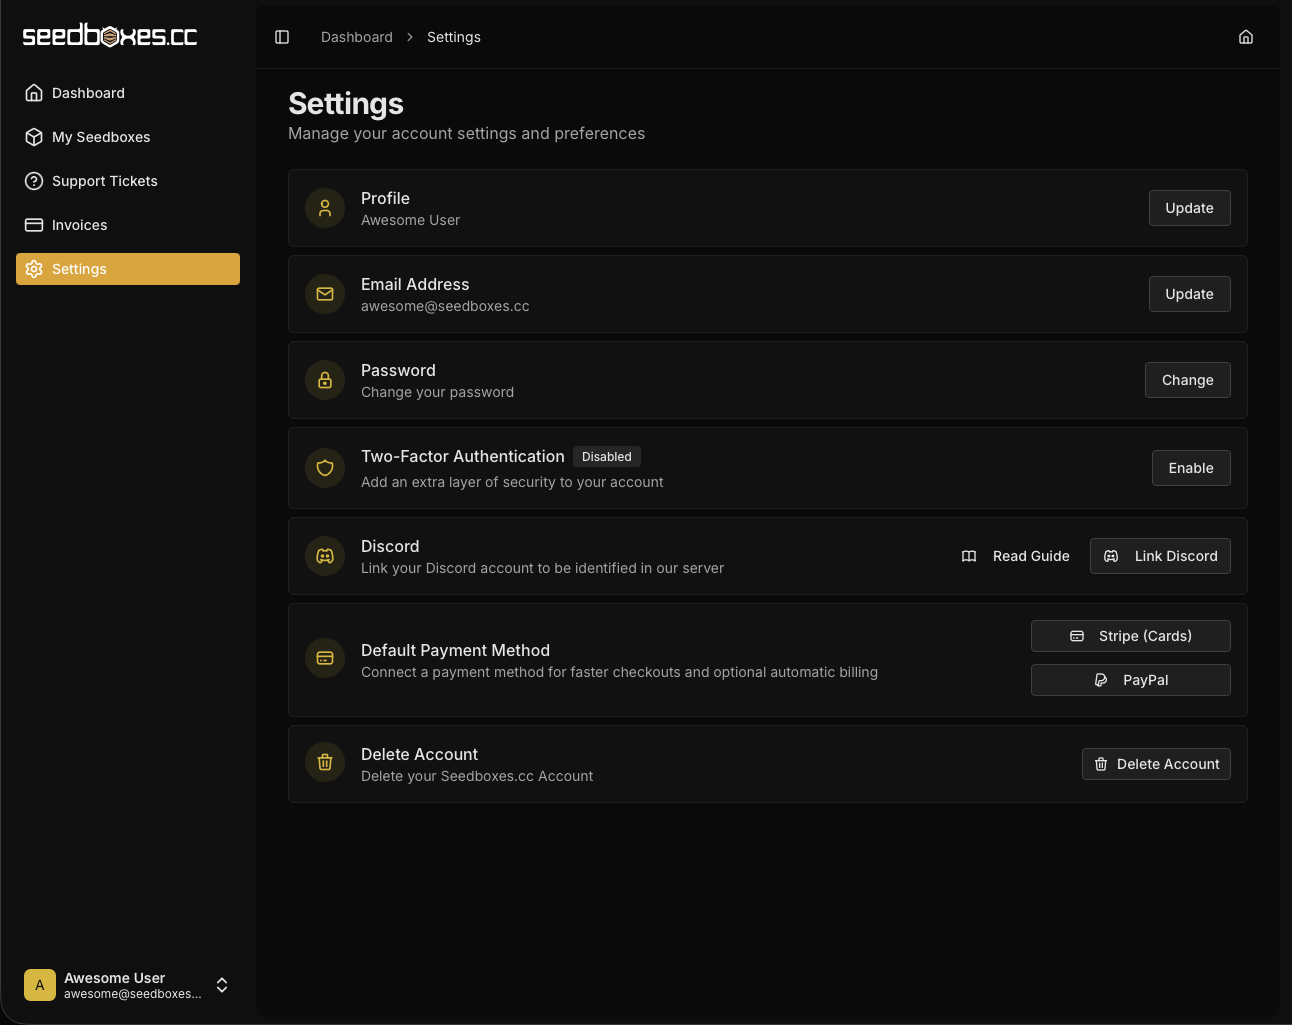
You can access your Settings area from the sidebar. Here you can do the following:
- Update the name in your Profile
- Change your Seedboxes.cc account email
- Change your Seedboxes.cc account password
- Enable or Disable two factor authentication for your Seedboxes.cc account, for added security during logging in.
- Link your Discord account, so that you can be identified automatically in our Discord Channel. There is a guide for this here.
- Enable/Disable a Default Payment Method in order to pay your invoices automatically.
- And finally you have the ability to delete your Seedboxes.cc account.
You cannot delete your Seedboxes.cc account while you have active services in your account
Managing your seedbox
From the main page of your client area, under the list which says My Seedboxes, locate the seedbox you want to manage and click on it.
After you do that, you will be redirected to the seedbox page that looks like this:
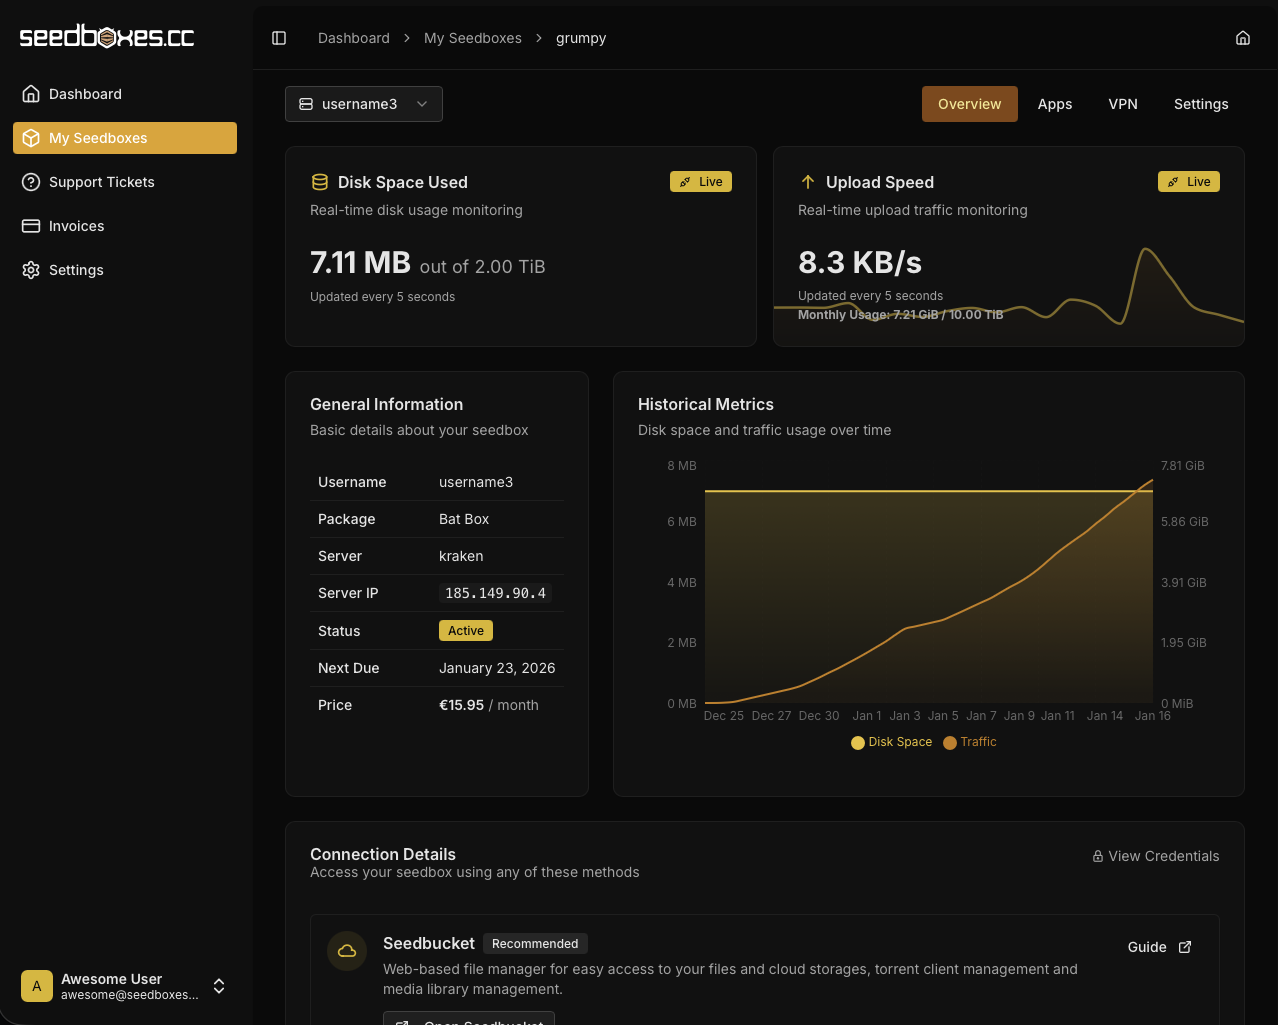
On the top right of the page is the main navigation of the subsections of your seedbox page: Overview, Apps, VPN and Settings.
Right below, you can see live usage statistics for your seedbox. This is the easiest and more accurate way to know if you are within the allowed limits of your seedbox. They update every 5 seconds.
Below the usage statistics, you will find the General Information which contains generic information about your seedbox such as server name, server IP, your currently selected torrent client and other useful information. And of course, on the right of the General Info, a nice Usage graph couldn't be missing from your client area.
Moving further down on the page you will find the connection details for the services of your Seedbox, how to connect to Seedbucket, your torrent client WebUI, and how to connect via FTP, SFTP, Webdav, SSH.
Apps
At this subsection of your seedbox page you can find the 1-Click Installable Applications. With the click of a button, you can install any of the available applications you see on the list to your seedbox.
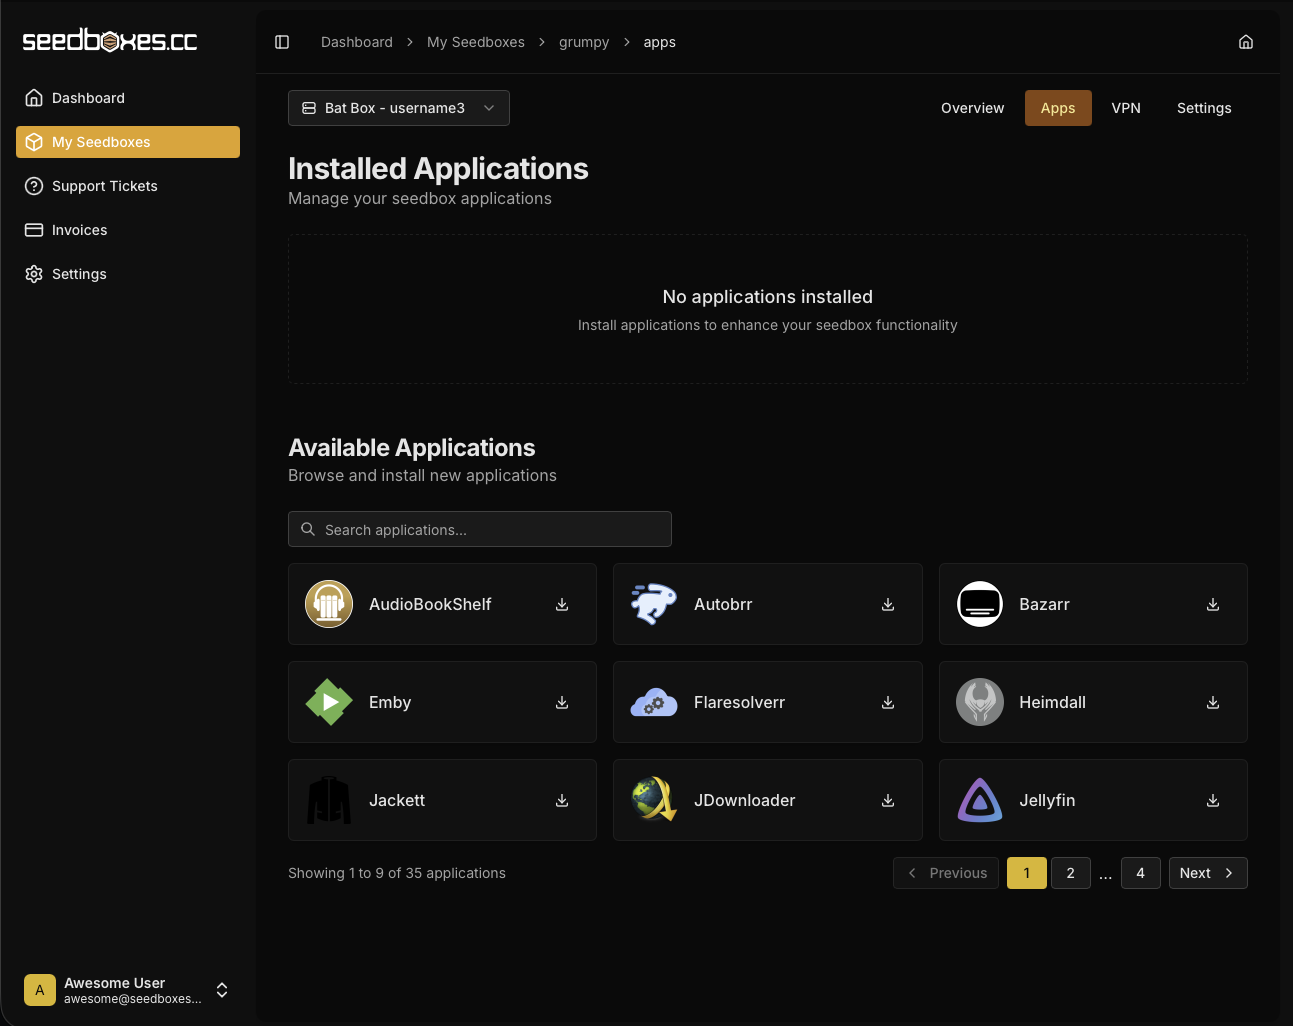
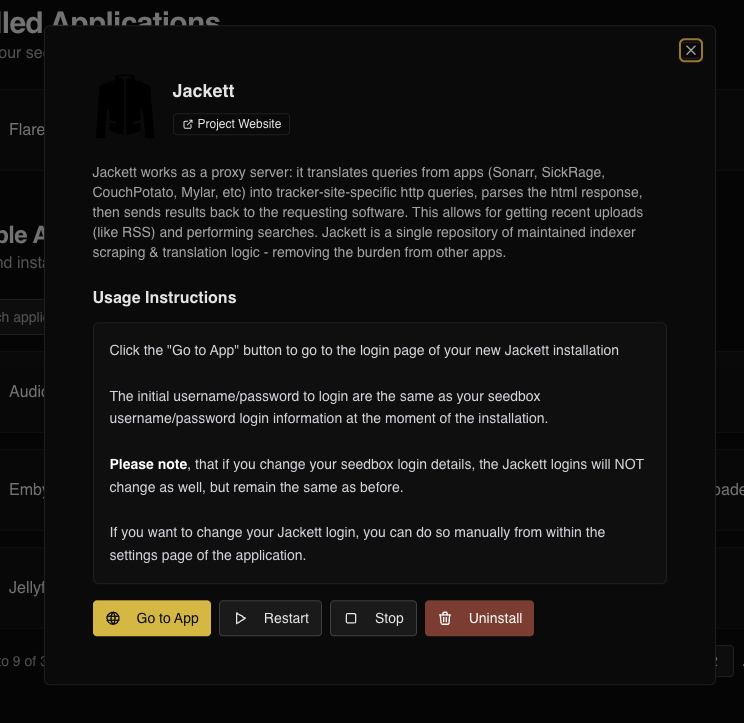
After you install an application, it will show in the "Installed Applications" list, and if you click on it, you can see "Usage information", along with action buttons to Restart, Stop, Uninstall the app.
If the application you've just installed has a web interface, in order to access it just click the Go to App button next to it.
We always try to have the latest versions available and we always add new applications to the list. All apps are set to automatically update every week.
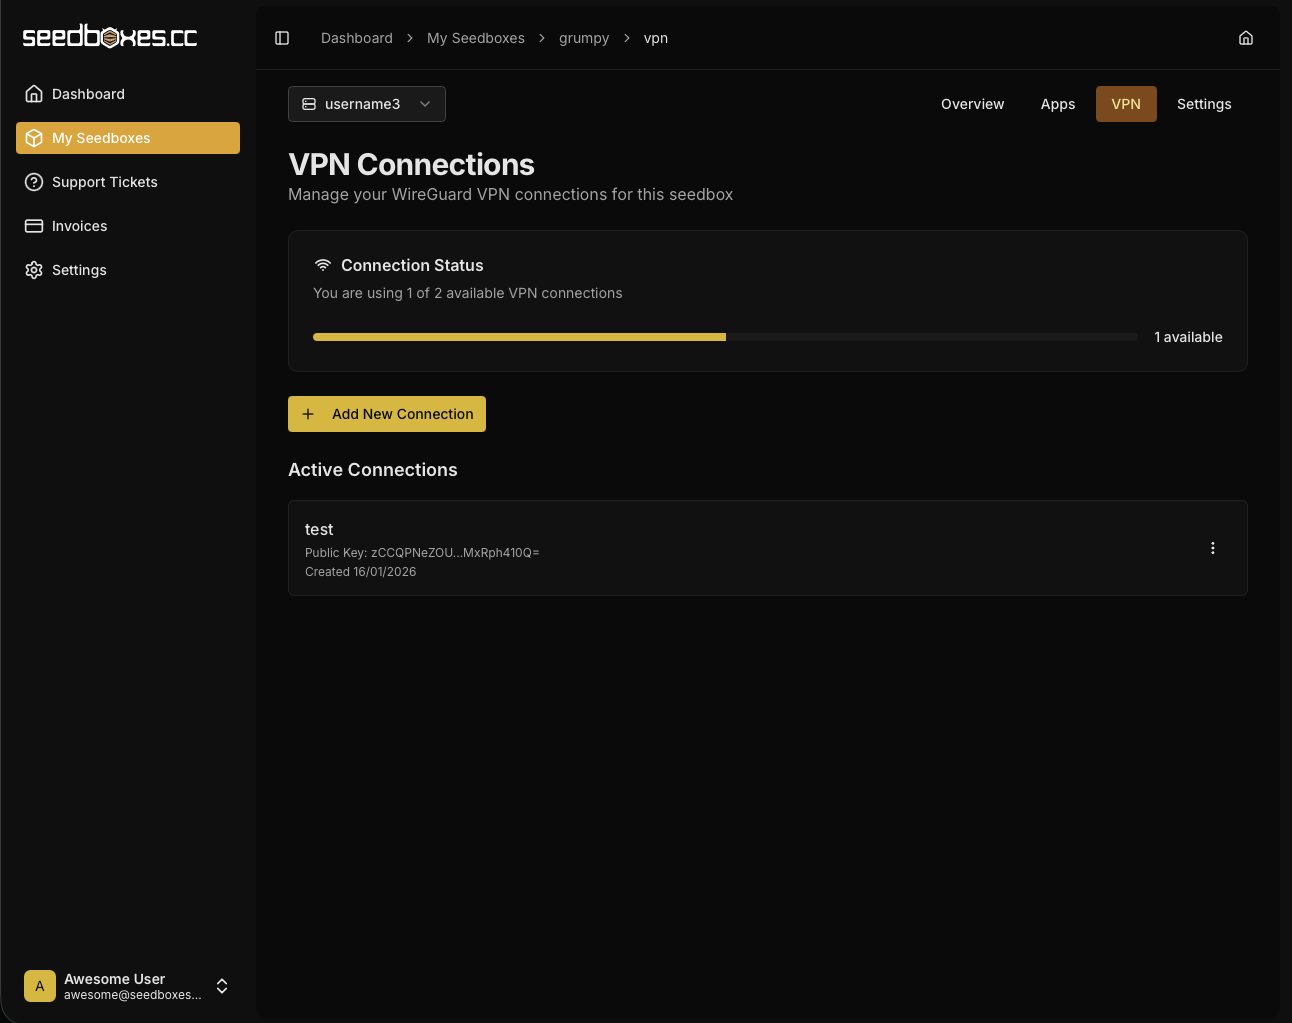
VPN
Under the VPN subsection you can add/remove for your VPN service and download the VPN configuration for your Wireguard client.
We have a guide on how to utilize the VPN service here.
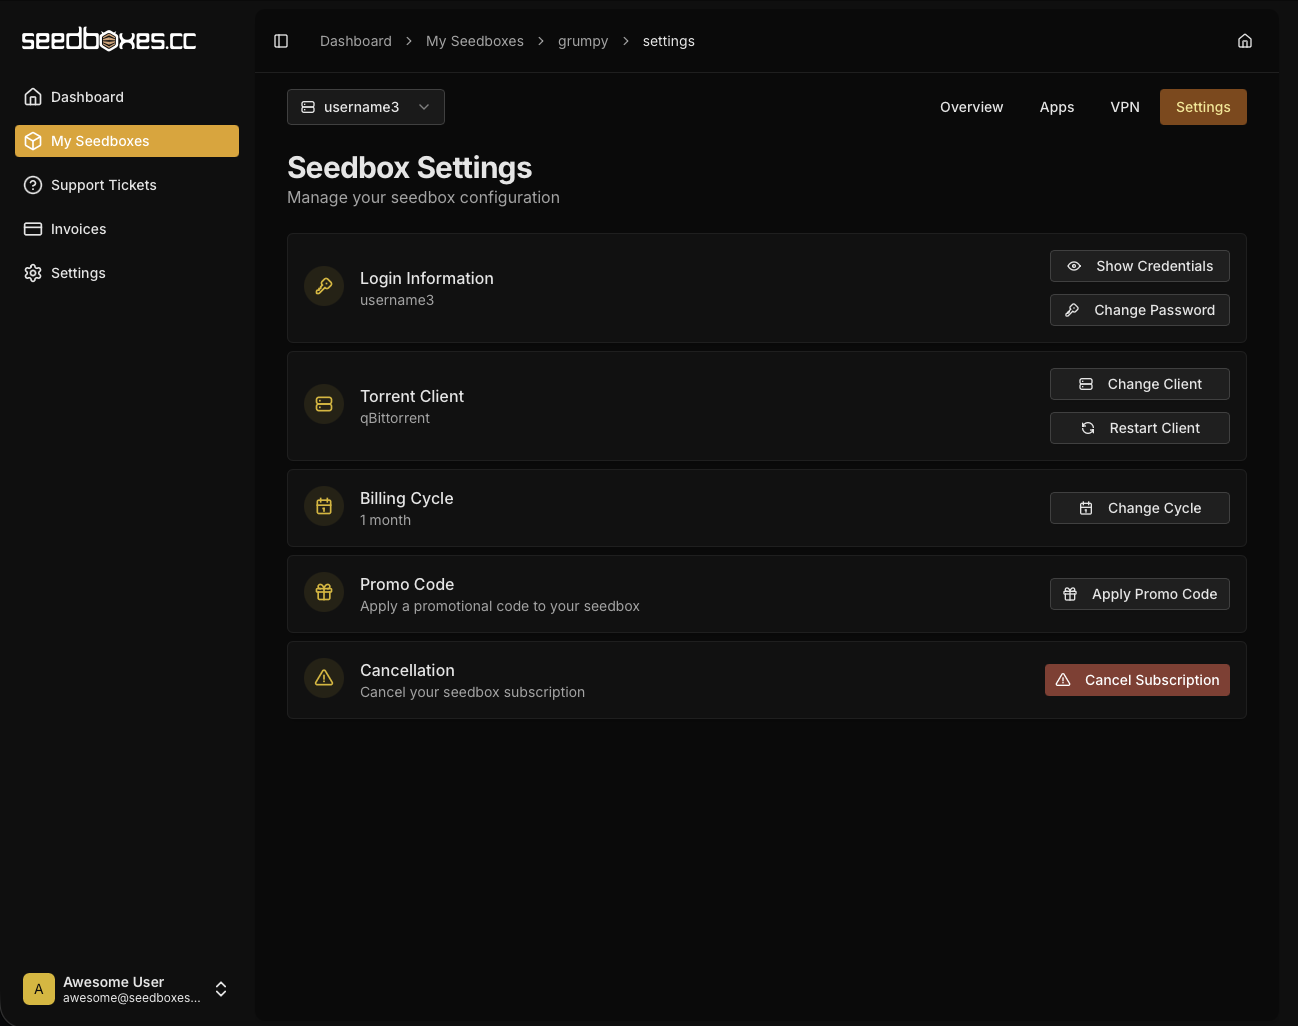
Settings
Under the Settings subsection you will find the options listed in the figure below:
- Login Information: The username and password of your seedbox. From here you can also change your seedbox password if required.
- Torrent Client: Change your default torrent client. Please note that you can only use one (1) torrent client at a time. Here also you have the option to restart your torrent client.
- Billing Cycle: You can change your billing cycle here, so that you will be charged at different interval for your service. Using the annual billing cycle, carries an additional discount as well.
- Promo codes: If you have any promo codes, enter them at the field and click the corresponding button
- Cancel Seedbox: If you ever wish to cancel your seedbox, this is the place to do it :(
The cancellation button in your client area, will automatically cancel your service at the end of the current billing cycle. If you wish to cancel your service immediatelly (in order to receive a refund in the first week of your service), please open a support ticket with this request.
It's time to move to the next step, to actually using your seedbox. This is just a basic guide on how to start using your seedbox but you can do much more advanced things which are not covered here.
Torrent Clients Web Interface
All our torrent clients (rTorrent, deluge, qbittorrent & transmission) have a web based interface which means that you can easily control your torrent client from your browser. That means, that you can access your torrent client from any device that is connected to the Internet. Even if you close your browser, your seedbox will continue downloading/seeding your torrents normally since it's a completely independent device as we have already explained.
In summary, in order to download a torrent you need to do the following:
- Go to your favorite torrent site and download the .torrent file you want to your computer or copy its magnet link.
- Open the web interface of your currently installed torrent client. If you do not remember the URL of your torrent client, please refer to the "Connection Details" of your seedbox within your client area as also described at the top of this guide.
- Add the .torrent file or the magnet link to your torrent client.
- Done! Your seedbox will now do the rest by simply downloading the torrent files which you can access any time. Below, we will explain in more detail step 3 for each of the available torrent clients.
ruTorrent
ruTorrent is the web interface for rTorrent. Because of the way that ruTorrent uses to communicate with your rTorrent, it is not able to handle more than 1000-1300 torrent files at the same time.
In order to add a torrent to your ruTorrent you need to do the following:
- Go to your ruTorrent web interface.
- From the upper left side, click "Add Torrent..."

- After you click it, the "Add Torrent" dialog will pop up. If you want to add a .torrent file, then simply use the "Torrent File" option. Assuming that you have saved the .torrent file locally on your computer, you can easily add it by using the "Browse" button. After you locate the .torrent file, click "Add File" and the torrent will automatically be added to your ruTorrent.
 If you want to add a magnet link instead, then simply use the "Torrent URL" option which is exactly below. Just paste the magnet link and click "Add URL".
 After you add the torrent, it will appear in the main list from where you will be able to watch its progress and run actions on it, such as removing it, stopping it etc
Deluge
Deluge provides its own web interface. Even though the web interface is stable, the deluge daemon itself can not handle a large number of torrents (like rTorrent) and it's mostly used for more aggressive seeding.
In order to add a torrent to your Deluge you need to do the following:
-
Go to your Deluge web interface.
-
A password prompt will appear. Enter your seedbox password and click "Login".

-
After you successfully login, the "Connection Manager" dialog will appear. Inside your connection manager, you should be able to see your Deluge daemon with status "Online". Simply select it and click "Connect"

- You are now connected to your deluge daemon. You can now easily add a .torrent file or a magnet link by simply clicking "Add" on the upper left side of your deluge interface.

- The "Add Torrents" dialog will popup. If you want to add a .torrent file (which you have previously saved locally on your computer) use the "File" button or if you want to add a magnet link, simply click on the "Url" button

After you add the torrent, it will appear in the main list from where you will be able to watch its progress and run actions on it, such as removing it, stopping it etc
Transmission
Transmission, just like Deluge, comes with its own web interface. Even though is very simple and clean, it's not the most popular client. It's mostly used if you have a very low number of torrents and you are not interested for advanced usage.
In order to add a torrent to your Transmission you need to do the following:
-
Go to your Transmission web interface.
-
On the upper left corner, click the "Open Torrent" button.

- After you click the Open Torrent button the "Upload Torrents Files" dialog will appear. From here, you can either add a .torrent file(s) by clicking on the "Choose Files" button or you can add a magnet link in the URL input box below and click "Upload".

After you add the torrent, it will appear in the main list from where you will be able to watch its progress and run actions on it, such as removing it, stopping it etc. As you can see, from all three, Transmission is the simplest one.
Qbittorent
Qbittorent is the torrent client with a lot of features support.
In order to add a torrent to your Qbittorrent you need to do the following:
-
Go to your Qbittorrent web interface.
-
On the upper left corner, click the "Plus" button.

- At the new modal, click "Browse..." button in order to upload the '.torrent' file (or files as you can upload multiple) and the hit the "Upload Torrents" button.

Connecting to your seedbox
We support a numerous ways and protocols to interact with your seedbox, to download your files to your computer or to use it for anonymity on the internet.
SSH
In order to interact with your seedbox you can do it via SSH (Secure Shell). This is basically a linux console which allows you to do more advanced things in a more efficient way, such as copying files from a remote server to your seedbox. Since the use of the linux terminal is a complex topic, we will not be covering it in this guide.
Related articles:
Recommended SSH clients:
- PuTTY (Windows)
FTP / FTP + SSL / SFTP
The easiest way to download your torrent files to your computer (or anywhere you want) is via FTP (File Transfer Protocol). We support both unencrypted FTP connections and encrypted FTP connections with the latter one as the strongly recommended way. SFTP (SSH File Transfer Protocol) is also supported but it's slower than FTP + SSL so the latter one is preferable since both have the same encryption strength.
Recommended FTP/FTPS/SFTP clients:
How to use your seedbox for anonymity
We offer a wireguard VPN solution to mask your identity on the internet, that comes for free with your seedbox.
VPN will encrypt ALL your network traffic from your computer to the internet and mask your identity. The disadvantage of using this is that since ALL your network traffic is encrypted, it might slow down your connection (though it should be negligible).
Depending on the seedbox plan, you can use 2-5 different VPN connections simultaneously. A wireguard connection created in your client area can be installed in many devices if you wish, but only one of them can be connected actively. This is a limitation of the way Wireguard works. If you try to connect at the same time from a second device with that same connection, it will either fail or your previous connected device will log out automatically.